Fun and Easy Face Painting Ideas in 2025 – Let’s Get Creative
Hi there, I’m Matthew, co-director of Kiddly-Winks Children’s Entertainment, and I’ve been doing face painting for over fifteen years now. Yep, that’s a lot of glitter, rainbows, and wiggly toddlers!
One thing I’ve learned? The creative possibilities are endless. From tigers and butterflies to superheroes and spooky skulls, face painting is such a fun way to bring a smile to someone’s day.
If you’re just starting out, don’t stress. It can feel a bit overwhelming at first (we’ve all had those wobbly lines), but with a bit of practice, your confidence and your brushwork will grow in no time. Every design you try gets you one step closer to your own style.
In this blog, I’ll walk you through some fun, beginner-friendly face painting ideas that anyone can try. Whether you’re a total newbie or already dabbling with detailed designs, I hope these spark a bit of inspiration.
So go on, grab your brush and paints. Let’s dive in and get creative!
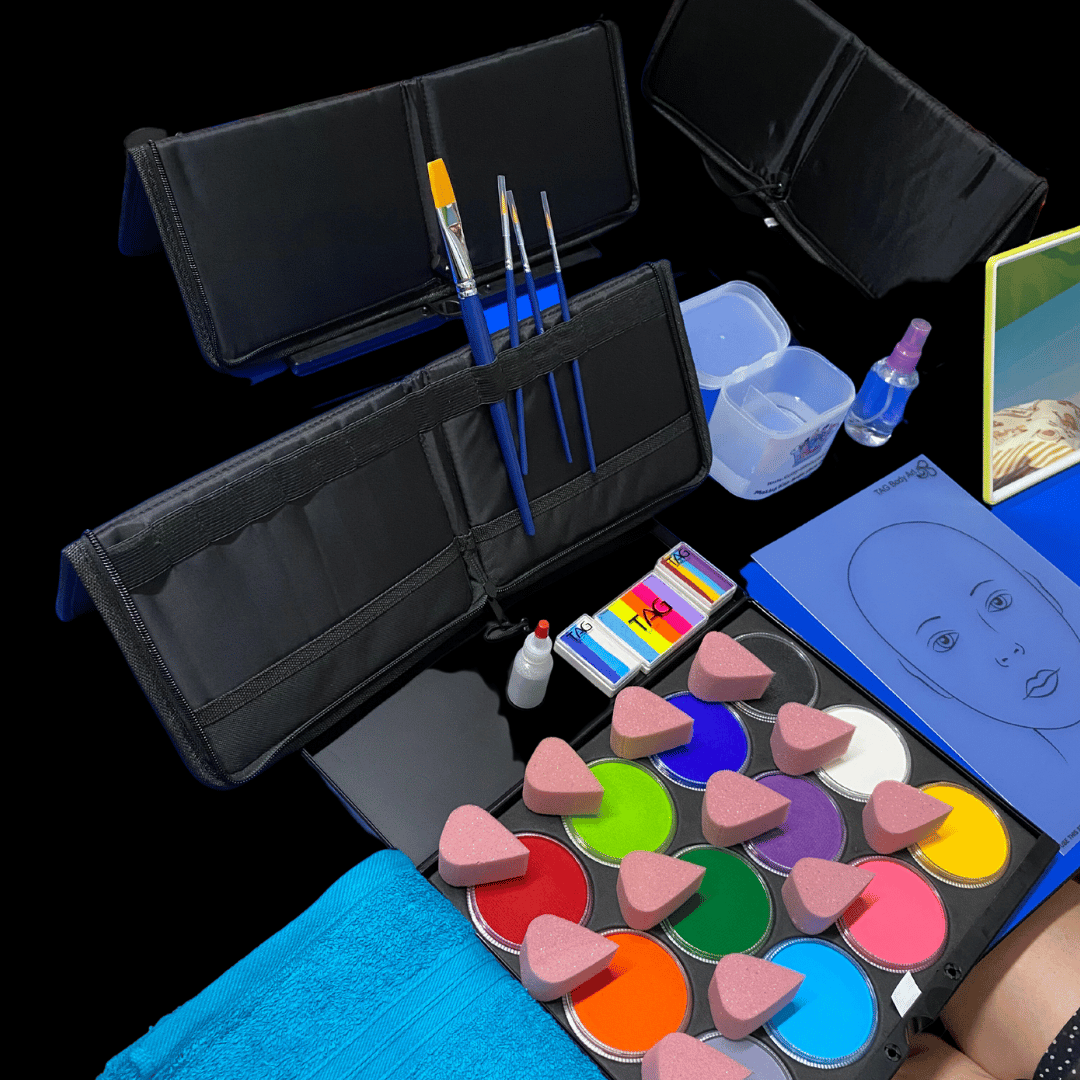
Here’s a List of Key Face Painting Supplies You’ll Need:
- Water spritzer
- Water tub
- Brushes
- Glitter
- Sponges
- Makeup wipes
- Hand towel
- Lots of paints!
You can purchase everything directly from the Kiddly-Winks Store!
You Will Learn Six Face Paint Designs
Step-by-Step: How to Paint a Realistic Butterfly Face Design
Whether you’re painting at a party or just having fun at home, this butterfly design is always a hit. Here’s how to get that soft, dimensional look with plenty of sparkle.
Step 1: Choose Your Colours
Pick a split cake that blends a few shades of the same colour (like light blue to deep blue or pink to purple). This gives you lovely shading and depth in the wings without needing to blend by hand.
Step 2: Apply the Wing Base
Use a damp sponge to gently pat the colour onto the skin. Soft pressure is key – just dab, don’t drag.
Tip: The bottom of the wings should stop at the nose line, and the top wings should go about halfway up the forehead for a balanced look.
Step 3: Outline the Wings
Grab a small round brush and load it with black or dark paint. Start at the outer corner of the eye and draw a fine line that curves up and around, following the shape of the wings. Keep it light and flowy – think butterfly, not bold eyeliner.
Step 4: Add Definition with an Angle Brush
If you have an angle brush, now’s the time to use it! It helps sharpen up those edges and add extra detail, especially around the wing tips.
Step 5: Paint the Body
Using a thin brush and a contrasting colour (black works well), paint a line straight down the middle of the face. Make the line a bit wider near the eyes and taper it as you move down – this gives the body a natural, tapered shape.
Step 6: Add the Antennae
From the top of the butterfly body, paint two curved lines upward, heading toward the centre of the forehead. These little antennae bring the whole design together.
Step 7: Finish with Glitter
Once the paint is dry, tap on a bit of cosmetic glitter along the wings and body. Go subtle or go sparkly- totally up to you!
And that’s it! A beautifully balanced, realistic butterfly that’s sure to get smiles all around. Give it a go and have fun experimenting with different colours and styles.
Let me know if you want a matching butterfly crown or floral accents as a bonus step!
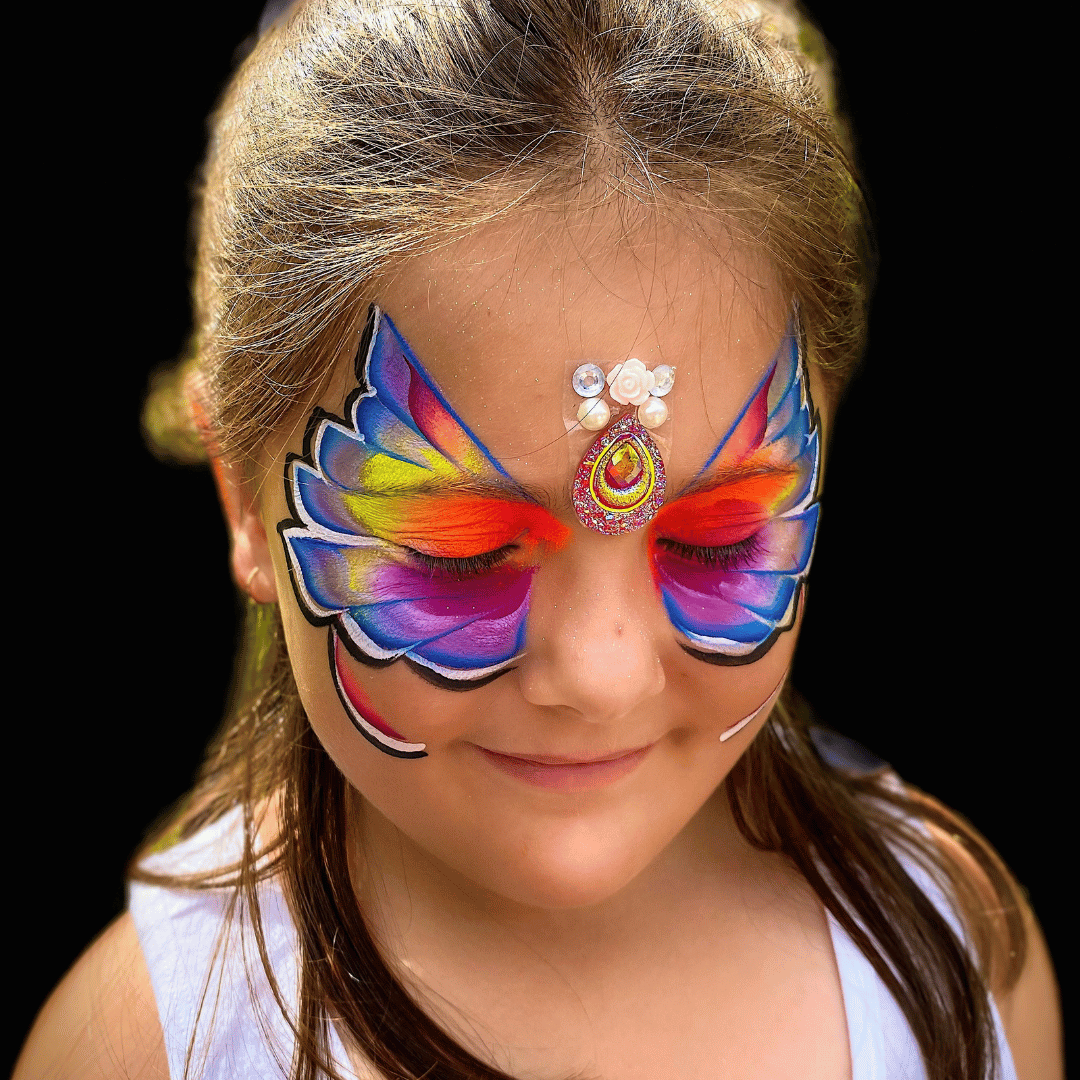
Check out this ‘Butterfly Face Paint’ Below:
Step-by-Step: How to Paint an Epic Superhero Mask
Whether it’s for a birthday party, dress-up day, or just weekend fun, a superhero mask face paint is always a winner. Here’s how to create one that’s bold, cool, and totally customisable to your child’s favourite hero.
Step 1: Pick Your Hero (and Colours!)
Start by choosing a superhero and matching your colour palette to their style. For example:
- Red for Spider-Man
- Blue and white for Captain America
- Gold and red for Iron Man
- Yellow and red for Flash
Let your child help choose, they’ll love being part of the process.
Step 2: Paint the Mask Base
Using a sponge or flat brush, apply face paint around the eyes, stretching across the upper cheeks and over the bridge of the nose. Think of it like painting a superhero mask directly onto the face.
Step 3: Add Emblems or Lightning Bolts
If your little one is into heroes like Flash, Captain America, or Wonder Woman, add extra details using white or gold paint. You can paint:
- A lightning bolt across the forehead
- A star emblem on the cheek
- Or even a shield or crown design for that extra wow factor
These little touches help personalise the look and make it feel extra heroic.
Step 4: Outline and Add Detail
Use black face paint and a fine brush to outline the edges of the mask and define any shapes or symbols. This step really sharpens the whole design and gives it that polished, comic-book look.
Step 5: Add Glitter (Optional but Awesome)
For a bit of glam, tap some glitter onto the mask while the paint is still slightly damp. It’ll catch the light and make your superhero shine – literally!
And That’s a Wrap!
Your child is now ready to zoom, fly, or save the day with their brand-new superhero look.
The best part?
Every mask can be as unique as the hero wearing it.
Let their imagination run wild, the possibilities are endless!
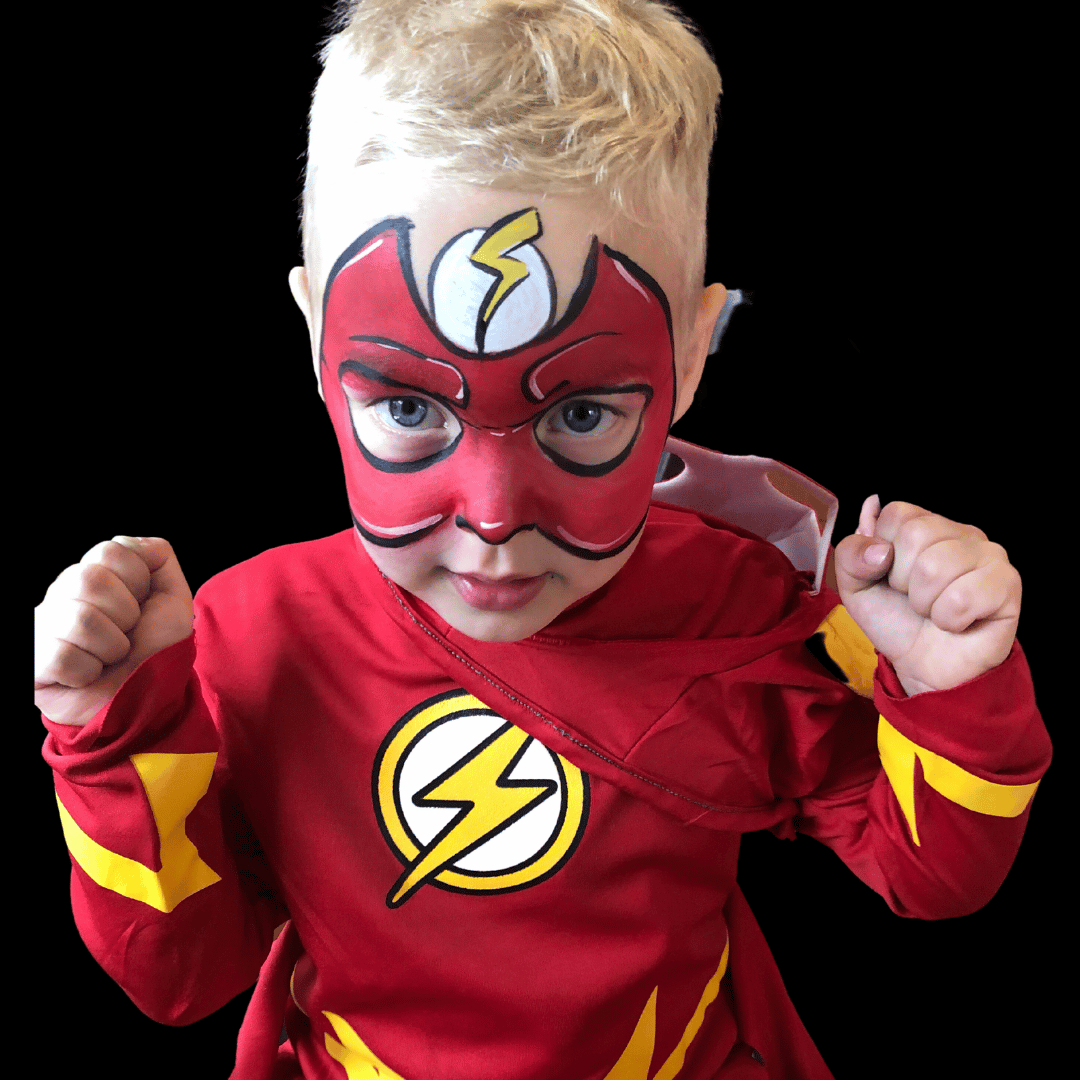
Check out this Flash face paint below for inspiration:
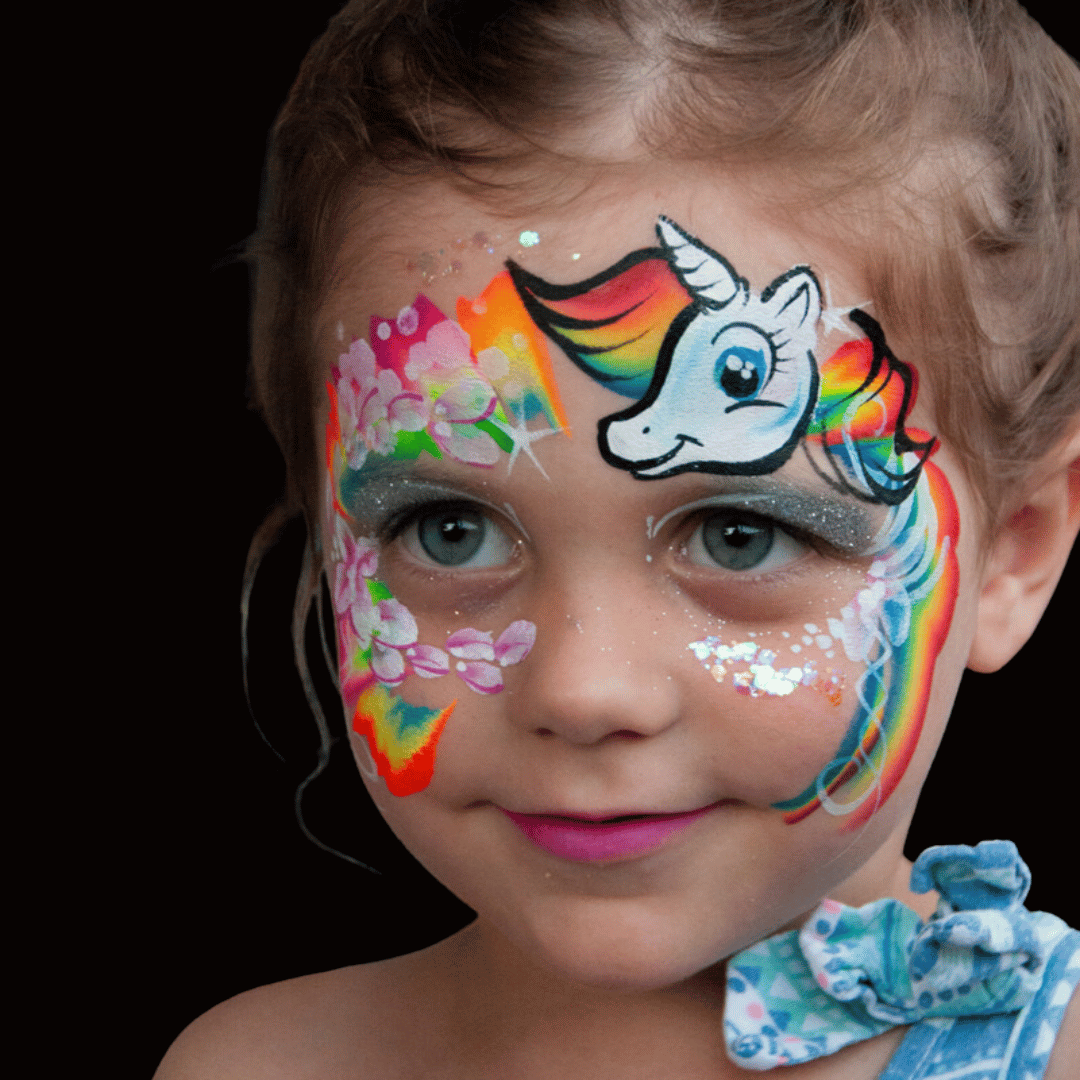
Step-by-Step: How to Paint a Colourful Rainbow Face Design
Rainbows are always a hit – bright, magical, and perfect for kids who love colour (or unicorns, or sparkle… or all three). Here’s how to create a rainbow face paint design that’s full of fun and imagination.
Step 1: Paint the Rainbow Base
Using a flat brush, start at the top of the rainbow with red, and work your way down through orange, yellow, green, blue, and finally purple at the bottom.
Sweep the rainbow across the forehead and cheeks, following a gentle arc.
Tip: If you’ve got a one-stroke rainbow cake, use it! It blends all the colours in one swipe and makes the whole process quicker and smoother.
Step 2: Blend for a Seamless Look
As you go, gently blend the edges between colours to avoid any harsh lines. The goal is a smooth transition from shade to shade, just like a real rainbow in the sky.
Step 3: Add Magical Details
Now the fun really begins. Around the rainbow, you can add:
- Fluffy white clouds using a sponge or dabbing brush
- Stars and sparkles with white or silver paint
- A tiny unicorn, heart, or fairy dust trails if you’re feeling creative
These extra touches help turn the rainbow into a whole little scene!
Step 4: Outline with Black for Definition
Use a fine brush and black paint to add details like raindrops, twinkles, or outlines around clouds or stars. This gives your design depth and helps the colours pop.
Step 5: Finish with Glitter
Of course, no rainbow is complete without a bit of glitter. Lightly dab on some cosmetic glitter around the clouds or across the rainbow for that dreamy, magical finish.
And You’re Done!
With just a few simple steps, you’ve created a stunning rainbow face paint look that’s bursting with colour and fun. Perfect for parties, festivals, or just a bit of creative play at home.
Check out this Rainbow Face Paint below for ideas:
Step-by-Step: How to Paint a Fierce Tiger Face
Whether it’s for a party, Halloween, or just a bit of fun at home, a tiger face paint design is always a favourite. Bold, bright, and a little bit wild – what’s not to love? Here’s how to create one that really roars.
Step 1: Get Inspired by Real Tigers
Before you start painting, take a quick look at some tiger photos. Notice how their stripes curve, where the white patches are, and how their colours blend from orange to yellow. This helps give your design that extra touch of realism (or at least a cool, wild vibe!).
Step 2: Create the White Base
Start by painting white around the eyes and mouth using a sponge or soft brush. This gives you a nice contrast base for the other colours and helps the design pop.
Step 3: Add the Tiger’s Main Colours
Blend orange and yellow together with a sponge and apply it over the rest of the face. Go around the white areas and make sure the colour covers evenly. Tip: A light tap-and-blend motion works better than dragging the sponge – this keeps it smooth.
Step 4: Paint the Tiger Stripes
Now for the fun part – stripes! Use black face paint and a fine brush to draw tiger stripes across the cheeks, forehead, temples, and chin. Start each stripe thin at the end and thicken it toward the middle.
Tip: Vary the angles and lengths a bit to make it feel more natural. Confident strokes are key here.
Step 5: Add Teeth (Optional but Fun)
Want to go all out? Use white paint and a small brush to add a couple of tiger teeth just above the top lip. Make sure to let the paint dry before touching or layering any other colours nearby.
Step 6: Add Glitter or Shimmer
To really make your tiger shine, dab a bit of glitter or shimmer around the nose, cheeks, or whiskers. It adds a fun twist and brings the whole look to life.
And You’re Done!
With a bit of practice, you’ll have this fierce tiger look down in no time. It’s a classic face paint design that works for all ages and never goes out of style.
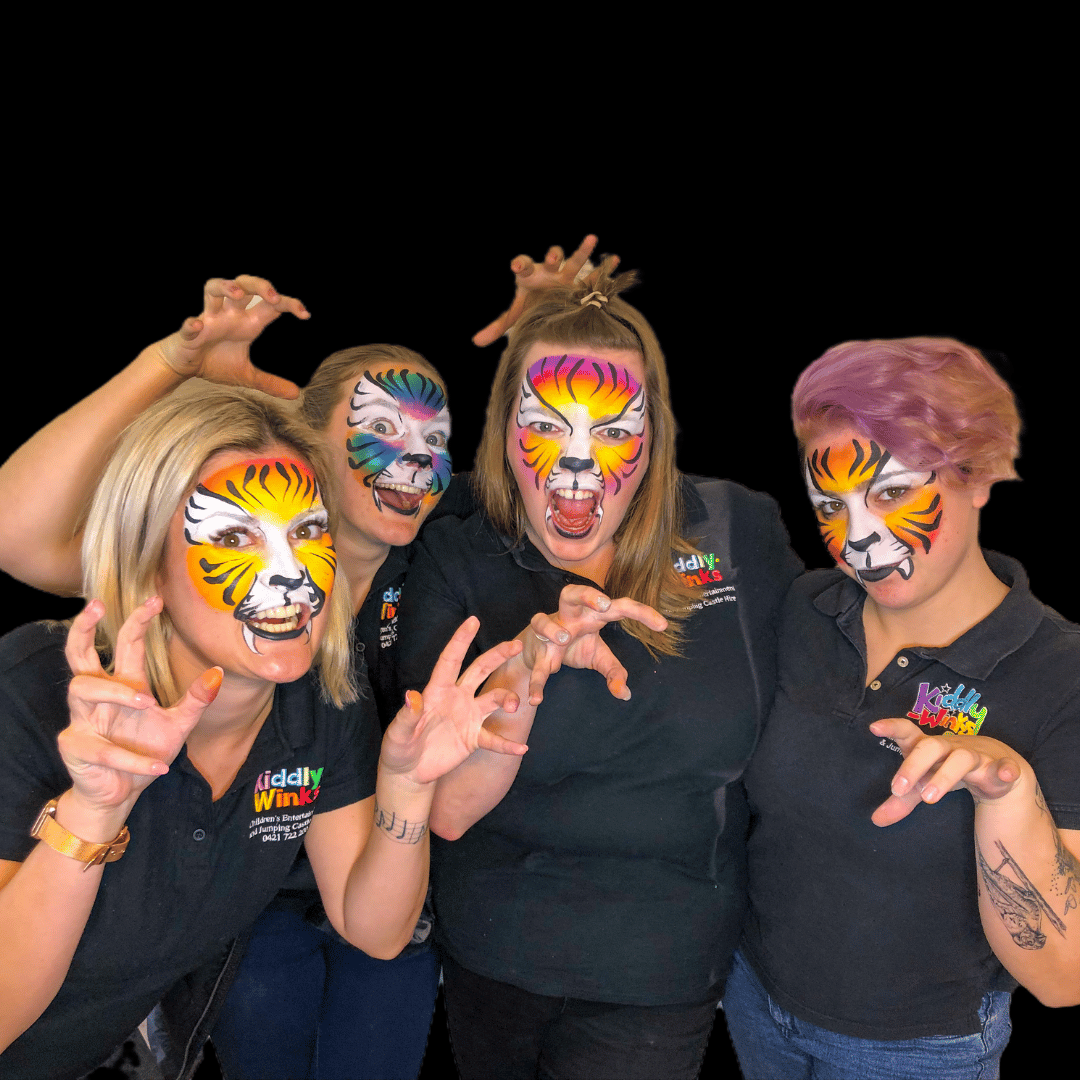
Here’s a photo of our staff painted as a tiger:
Step-by-Step: How to Create a Magical Unicorn Face Paint
Unicorns are always a hit with kids. They’re colourful, sparkly, and full of imagination. This simple guide will help you paint a magical unicorn look that’s sure to delight.
Step 1: Start with a Soft Base
Use a sponge or brush to apply a light base colour across the forehead and upper cheeks. Soft shades like white, pastel pink, or lavender work beautifully. Make sure to blend the colour evenly for a smooth, dreamy background.
Step 2: Paint the Colourful Mane
With a thin brush, create flowing lines across the forehead and down the cheeks using bright colours like pink, purple, blue, and green.
Layer the colours and vary your brushstrokes to give the mane texture and movement.
Tip: One-stroke paints are great for this. They give you a burst of blended colour in a single swipe and make it easy to add that unicorn flair.
Step 3: Add the Unicorn Horn
In the centre of the forehead, paint a spiral horn using gold or silver face paint.
You can do this freehand or use a stencil to keep it nice and neat.
While the paint is still a little wet, tap on some glitter to give it that magical sparkle.
Step 4: Outline the Design
Once the paint is dry, grab a fine brush and some black paint.
Outline the horn, define parts of the mane, and add a few details around the edges.
This helps the colours stand out and gives the design a more polished finish.
Step 5: Add Finishing Touches
To bring the unicorn to life, add small details like white or silver stars, sparkles, and tiny flowers.
You can also add some highlights to the horn and mane using white paint. These little touches add depth and really complete the look.
And You’re All Set
Your child is now a magical unicorn, ready for fun and adventure.
This design is perfect for parties, playdates, or just a bit of creative fun at home.
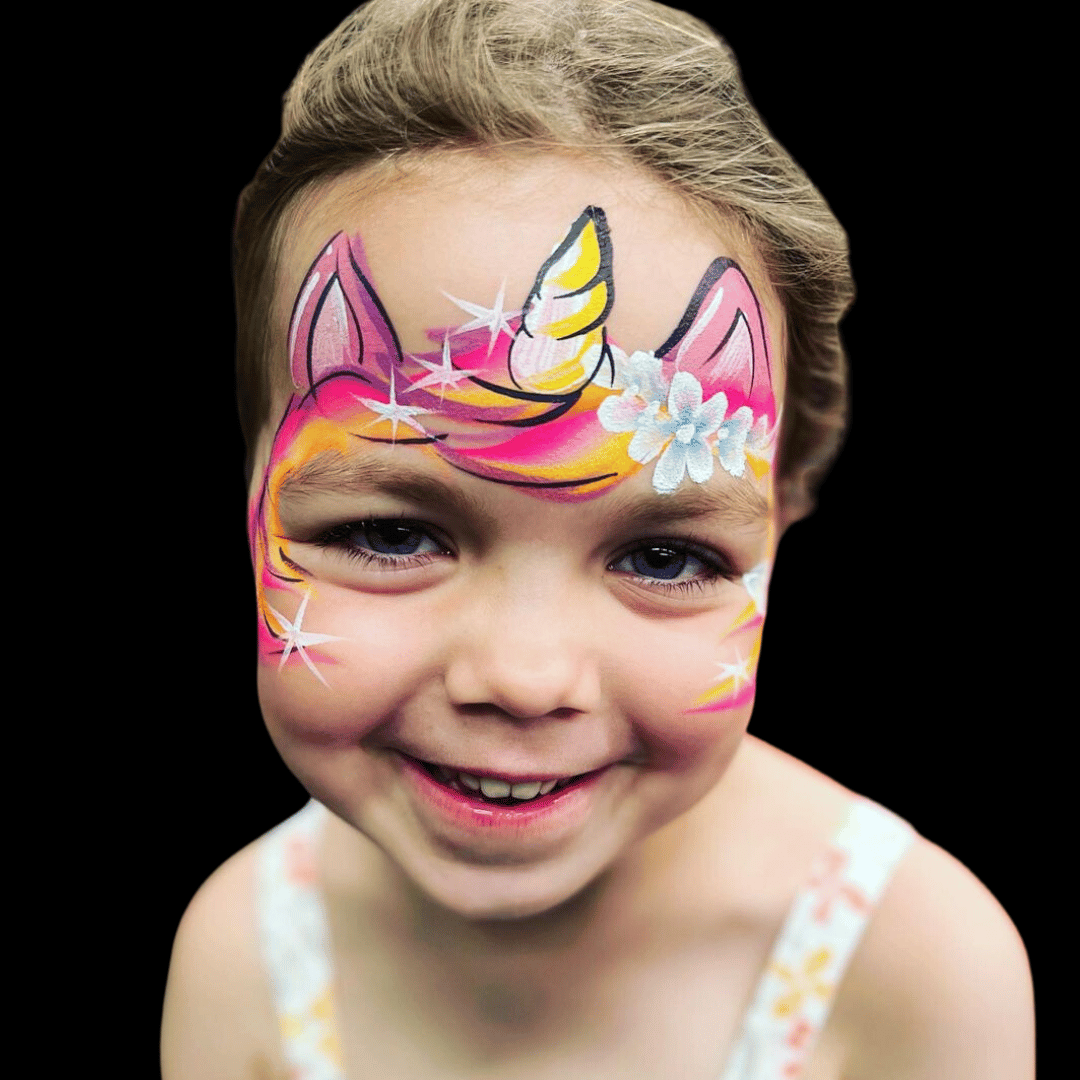
Check out this Unicorn Face Paint below for inspiration:
Step-by-Step: How to Create a Stunning Mermaid Face Paint
Dreamy colours, shimmering scales, and a little ocean magic – this mermaid face paint design is perfect for kids who love all things under the sea. Follow these simple steps to bring a beautiful mermaid look to life.
Step 1: Create the Ocean-Inspired Base
Start by applying a mix of blue and green face paint across the forehead, cheeks, and around the eyes. Blend the colours softly to create a watercolour effect that feels like waves in the ocean. Don’t be afraid to layer the paint a little. The more blending you do, the more depth you’ll get.
Step 2: Add Scales with a Stencil or Brush
Once the base is dry, use a mermaid scale stencil or a fine brush to add scales on the forehead and cheeks. Try using purple, turquoise, or silver for the scales to really make them stand out. You can overlap colours for a bit of shimmer and dimension.
Step 3: Paint Sea Details
To bring your design to life, use lighter shades of green and blue to paint seaweed, bubbles, or even tiny sea creatures. Add these around the edges of the face or near the temples to give the whole look an underwater vibe.
Step 4: Add Sparkle
Lightly tap glitter over the scales and around the eyes for a magical finish. This step adds sparkle and ties the whole design together with a bit of mermaid shimmer.
And You’re Done
With a few simple steps, you’ve created a magical mermaid look that’s full of ocean colours and sparkle. Perfect for parties, school events, or just a bit of dress-up fun.
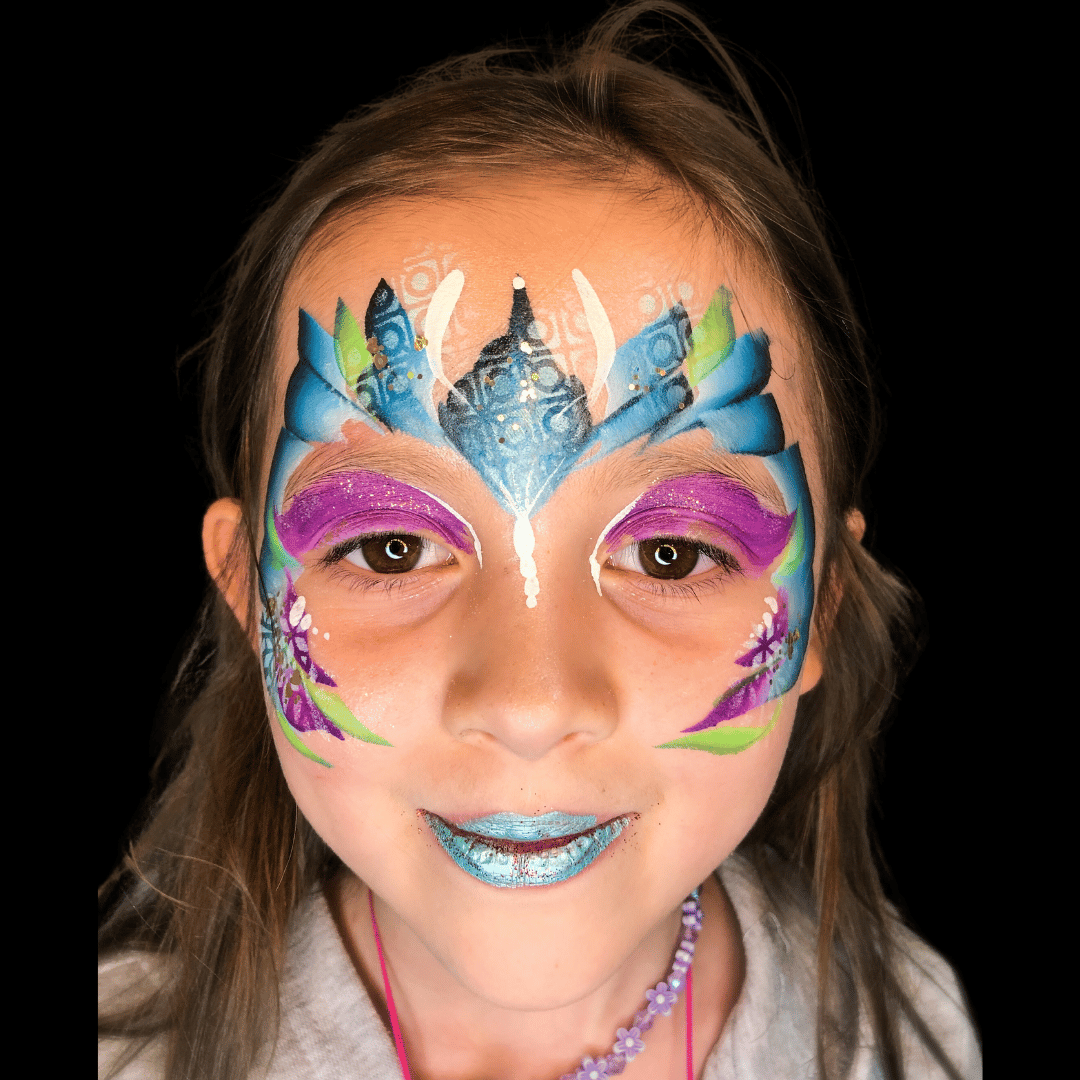
Check out this Mermaid Face Paint below for inspiration:
Conclusion
Face painting is such a fun and creative way to add a bit of wow to any occasion. With the ideas above, you’ve got everything you need to start experimenting with colours, patterns, and styles. Don’t be afraid to get a little messy, try something new, and most importantly – enjoy the process!
Of course, we know that not everyone has the time (or steady hand!) to pull off detailed designs on the day. That’s where we come in.
At Kiddly-Winks Children’s Entertainment, our team of friendly, experienced face painters are ready to bring a splash of magic to your next event. From birthday parties and school fairs to themed events and christenings, we’ve got a face paint design for every little imagination. See our face painting prices here.
We only use top-quality, skin-safe paints that are gentle on young faces and easy to wash off at the end of the day. Whether your child wants to become a tiger, a unicorn, a superhero, or something totally unique, we’ve got it covered.
Let us take care of the creative side so you can relax and enjoy the smiles, giggles, and unforgettable moments.
Take a look at our Face Painting Packages here.
How we create
Magical Experiences
For you
- Party Consultation Service so you can save time & avoid stress.
- Your Child, As The Star Of The Magic Show gives you precious photos.
- We Lead “Happy Birthday” and a Group Photo so you can enjoy the moment.


